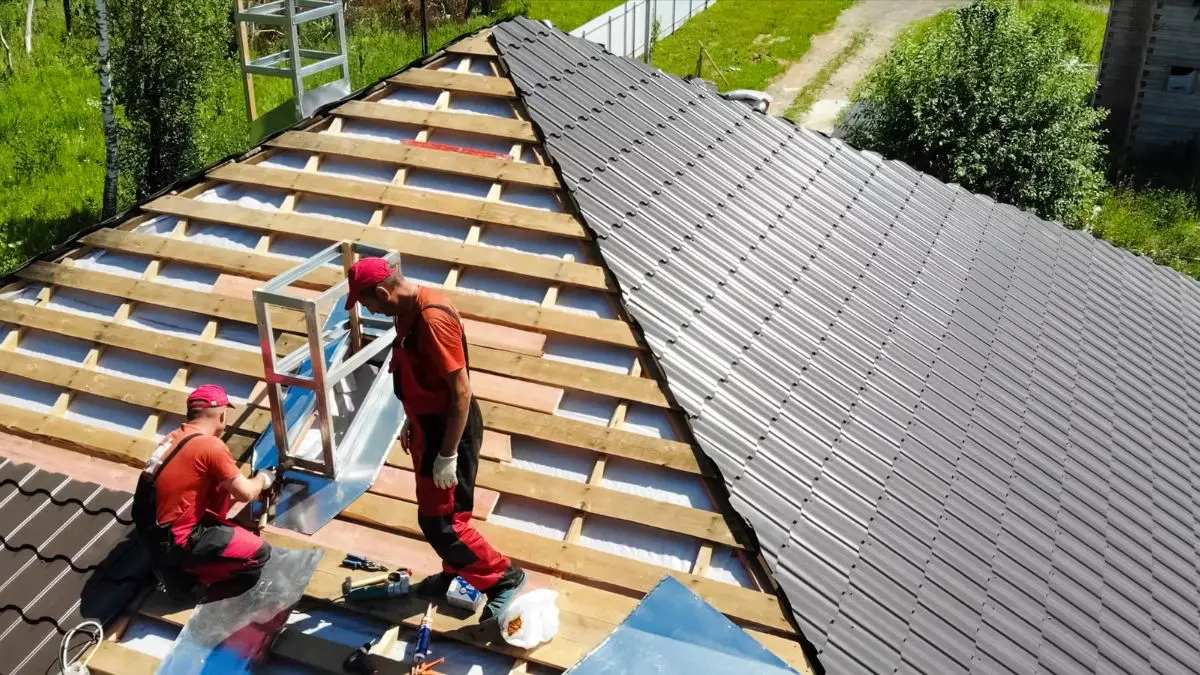
Before embarking on a DIY roofing installation, it’s crucial to consider certain factors that may impact the feasibility of this project. The location of your home, weather conditions, your skill level, and the type of roofing material you plan to use all play a significant role.
Key takeaways
- DIY roofing installation is most realistic on simple, low-pitch roofs using asphalt shingles
- Check permit requirements with your local building department before tearing off any roofing
- Plan around Massachusetts weather, aiming for dry, mild stretches in late spring or early fall
- Hire a licensed pro for steep, complex, or damaged roofs and for anything you cannot do safely
The often harsh and unpredictable weather conditions in Massachusetts can pose additional challenges.
This article explores the practicality of DIY roofing installation for homeowners in Massachusetts, providing you with insights to decide whether this route is right for you.
Advantages and Disadvantages of DIY Roofing Installation in Massachusetts
Advantages:
- Cost Savings – The primary motivation for most homeowners to opt for a DIY roofing installation is the potential cost savings. However, let’s not forget that professional roofers, such as Mighty Dog Roofing North Boston, Massachusetts, are trained and experienced.
- Control Over Materials – Another advantage of DIY roofing installation is having control over the materials used. You can choose the quality and type of materials that fit your budget and preferences.
- Satisfaction in Accomplishment – For some, there is a great sense of satisfaction in completing a DIY project successfully. The same applies to roofing installation, especially if it’s your first time doing such a significant task.
Disadvantages:
- Safety Concerns – Roofing installation can be a dangerous task, especially for inexperienced individuals. Working at heights and handling heavy materials can put you at risk of accidents and injuries.
- Time-consuming – DIY roofing installation requires time, effort, and patience. It’s essential to have realistic expectations about the timeline of your project, as it may take longer than if done by a professional.
- Potential for Costly Mistakes – Inaccurate installation or improper sealing can lead to future leaks and costly repairs. This is why having the necessary skills and knowledge is crucial before attempting a DIY roofing project.
Considerations for DIY Roofing Installation in Massachusetts
Location of Your Home
The weather conditions in Massachusetts vary significantly, with hot summers and cold, snowy winters. Before deciding on a DIY roofing installation, it’s crucial to consider how these conditions may affect your project.
For example, if you plan to install a metal roof during winter, you may run into challenges due to freezing temperatures and potential snow buildup. Strong winds or heavy rain can also hinder progress and pose safety risks.
Your Skill Level and Experience
Roofing installation requires a certain level of knowledge and experience to ensure it’s done correctly. If you have no previous roofing experience, leaving this task to the professionals may be best.
However, if you have some DIY experience or are willing to put in the time and effort to learn, then a DIY roofing installation may be a feasible option.
Type of Roofing Material
The type of roofing material you choose can also impact the feasibility of a DIY installation. Some materials, such as asphalt shingles, are easier to install than others, like metal or tile roofs.
Researching and understanding the specific requirements and techniques for your chosen material is essential before attempting the installation yourself.
Required Tools to Complete the Job
You’ll need the necessary tools to complete a DIY roofing installation. These may include:
- Ladder
- Hammer
- Safety harness
- Roofing nailer
- Measuring tape
- Chalk line
Having all the required tools before starting your project is crucial to avoid delays or safety hazards.
Local Building Codes and Regulations to Keep in Mind
Before starting any roofing installation project in Massachusetts, it’s crucial to familiarize yourself with local building codes and regulations.
These may vary by city or town and can impact the type of material you can use, the slope of your roof, and other factors. It’s vital to ensure your DIY project complies with these codes to avoid potential fines or issues when selling your home in the future.
Step-by-Step Overview of a DIY Roofing Installation
Understanding the full sequence helps you judge whether the project fits your skills. A typical asphalt shingle job starts with removing old roofing down to the deck, then inspecting the sheathing for rot or soft spots and replacing damaged sections. Next comes drip edge along the eaves, an ice and water barrier along the lower edges and in valleys, and underlayment across the rest of the roof.
After that, you install flashing around chimneys, vents, skylights, and wall junctions, then lay starter shingles and work upward in courses, following the manufacturer’s nailing pattern. Ridge vents or ridge caps finish the top. Each step affects the next, and small errors in flashing or nailing are a common source of leaks. If any step feels unfamiliar, that is a good point to bring in professional help rather than guess.
Before you start, check the weather forecast carefully and only open up as much roof as you can close in the same day. Keep tarps and fasteners on hand in case rain moves in. Working with at least one helper on the ground, and never alone on the roof, makes the whole process safer and more efficient.
- Tear off old roofing and inspect the deck
- Install drip edge, ice barrier, and underlayment
- Flash chimneys, vents, and valleys carefully
- Lay starter strip, shingles, and ridge caps
Budget Factors to Weigh Before You Start
Doing the work yourself can reduce labor costs, but it does not make a roof cheap. Materials, underlayment, flashing, fasteners, and disposal fees all add up, and you may need to rent a dumpster, scaffolding, or a roofing nailer. Safety equipment such as a harness, roof anchors, and sturdy footwear is essential, not optional. Prices vary by region and season, so gather local quotes for materials and rentals before deciding.
Also factor in hidden costs. Rotten decking discovered during tear-off can add unexpected expense, and mistakes may require redoing sections. Some shingle manufacturers limit warranty coverage when installation is not done by a certified contractor, so read warranty terms carefully. Finally, consider your time. A roof that takes a crew a few days might take a homeowner several weekends, leaving the house exposed to weather in between.
It helps to write a simple budget sheet listing materials, rentals, safety gear, disposal, and permit fees, then add a contingency for surprises. Comparing this total against a few professional quotes gives you a realistic picture of what you would actually save. For some homeowners, the difference is smaller than expected once equipment, time, and risk are counted.
When to Call a Professional Roofer Instead
Some roofs are simply not good DIY candidates. Steep pitches, multiple stories, complex rooflines with many valleys and dormers, and materials like slate, tile, or standing seam metal generally call for experienced crews with specialized equipment. The same goes for roofs with widespread structural damage, sagging areas, or signs of long-term leaks that may have affected framing or insulation.
It is also wise to call a pro if you are unsure about permits, if your homeowners insurance requires licensed installation, or if you cannot commit to finishing quickly. Massachusetts weather can shift fast, and a half-finished roof left open during a storm can lead to interior damage. Many homeowners find a middle path useful: hiring a contractor for tear-off and complex flashing while handling cleanup or other simpler tasks themselves, if the contractor agrees.
When comparing roofers, ask for written estimates that explain materials, underlayment, flashing details, cleanup, and warranty coverage. Check that they hold the licenses and insurance your town requires, and ask how they handle unexpected deck damage. A clear contract protects both sides and makes it easier to compare bids fairly, even if you ultimately decide to do part of the work yourself.
- Steep or multi-story roofs
- Slate, tile, or metal roofing
- Structural damage or sagging decks
- Insurance or warranty requirements for licensed work
Frequently Asked Questions
Do I need a permit for a DIY roofing installation in Massachusetts?
In many cases, yes. Massachusetts communities generally require a building permit for roof replacement, and homeowners doing their own work may need to meet specific requirements. Rules vary by town, so contact your local building department before starting. They can explain inspections, layering limits, and any paperwork needed for homeowner-performed work.
What is the best time of year to replace a roof in Massachusetts?
Late spring through early fall is usually the most practical window. Asphalt shingles seal best in mild, dry weather, and you avoid snow, ice, and freezing temperatures. Summer heat can make shingles soft and working on the roof exhausting, so many homeowners aim for dry stretches in late spring or early fall.
Can I install new shingles over old ones?
Some building codes allow a second layer of asphalt shingles in certain situations, but it is not always permitted or advisable. Overlaying hides the deck, so you cannot check for rot, and it adds weight. Ask your local building department about layering limits and consider a professional inspection before deciding.
What is the hardest part of installing a roof yourself?
Flashing and safety are usually the hardest parts. Getting flashing right around chimneys, valleys, vents, and walls takes precision, and mistakes there often cause leaks. Working safely at height with fall protection throughout the job is also demanding. Many homeowners underestimate how physically tiring tear-off and carrying materials can be.
Conclusion
DIY roofing installation can be a feasible option for homeowners in Massachusetts, but it’s essential to consider various factors before making this decision.
Evaluating your skill level, weather conditions, and materials will help you determine if this is the right route for you. Additionally, always prioritize safety and follow local building codes to ensure a successful and compliant project.
Overall, it’s a doable project, but make sure to be realistic in whether you have the skills and tools to complete it.