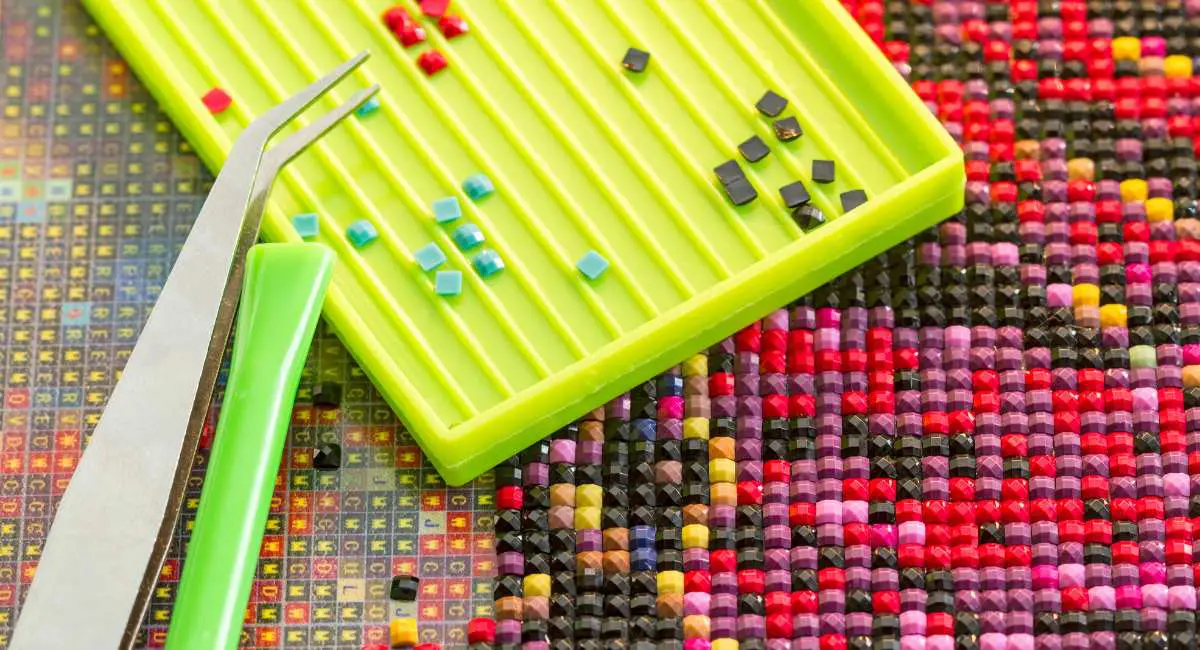
Diamond Painting is the Art of painting to make images or patterns with cross stitches by using colorful beads and facet beads. These materials are called “drills” and “diamonds.” These diamonds are applied to a sticky canvas to create amazing artful paintings.
Key takeaways
- Choose a smaller canvas and round drills for your first project
- Work one small section at a time and keep unused canvas covered to protect the glue
- Organize drills in labeled containers so matching symbols stays quick and easy
- Seal and frame finished pieces to keep drills in place and protect them from dust
How is Diamond Painting done?
A Diamond Painting kit is required for doing Diamond Painting; the canvas used in Diamond Paintings has a color code. It uses different colors to identify, to stick the diamonds on a particular place on the canvas. There
Are symbols, numbers, and alphabets for guidance in placing the diamonds in the specific spot on the canvas to create beautiful Art? The canvas has glue, which helps the diamonds to be applied to it.
Why do you need to try Diamond Painting?

Everyone should try Diamond Painting as it is a great, relaxing activity that can bring lots of joy and help to relieve the brain from daily life’s stress. It’s simple yet enjoyable, interesting, and delightful.
Diamond Painting does not require major skills, Lots of practice, huge amounts of time, and learning Art from scratch. So get the Diamond Painting kit, start painting, join the diamonds, and alter the small diamonds into beautiful Art.
Creating Art will not only make you happy, but it can help you get the respect of people around you. You can show them you have some talent and get praise in return.
Diamond Painting is great because it is not only limited to skillful painters, but noobs can also make good progress. Furthermore, diamond Paintings are not restricted to any age group; they can amuse children, teenagers, middle-agers, and older people.
What is a Diamond Painting kit?

A diamond Painting kit is a set of tools necessary to create Diamond Paintings.
What is included in the Diamond Painting kit?
- A Diamond Painting kit has the following items
- A pre-printed canvas has design charts, and sticking is on the canvas.
- Packs of different colored diamonds, each in a separate pack.
- The diamond pen tool picks diamonds and puts them on the canvas.
- Wax is applied on the pen to pick up diamonds.
- Tweezers are also used to place the diamonds.
Types of Diamond shapes

The diamonds in the Custom Diamond Paintings come in various shapes. This is because different types of kits have different shapes of diamonds. The difference in diamond shapes has particular uses and purposes, and the shapes of the diamonds depend on the person’s level.
The shapes of diamonds are as follows:
- Round Diamonds
- Square Diamonds
- Aurora Borealis
- 3D Diamonds
- 5D Diamonds
Round diamonds are simple; they can be applied and placed easily and swiftly. These shapes are ideal for beginners and noobs.
Square diamonds are square; they take effort and practice to apply. Therefore, these shapes are suited for people who need more experience.
Aurora Borealis diamonds are known for their colorful elegance; these glittering diamonds are used in shimmering arts.
3D diamonds have three facets on each side of the diamond, called 3D; they are also used for normal Diamond Painting.
5D diamonds have five facets on each side of the diamond, hence called 5D; these diamonds are used for extraordinary Diamond Painting and have better colors, shades, and textures.
Tips and Tricks
- To have an efficient experience with Diamond Painting Kits, you should start placing the diamonds in one section, do not place diamonds here and there; instead, select a section and complete it.
- Read the color-coded scheme first to know which colors you need to use; avoid creating a mess by grabbing all colors at once; it may cause a mixing of colors.
- To make it easier to pick diamonds, put the diamond bags in the tray and gently shake them back and forth; this will appropriately cause the adjustment of diamonds.
- Do not remove plastic from the entire canvas to avoid dust issues from the area where you are not applying diamonds.
- Cover the wax with cellophane so it doesn’t lose grip.
- Use a chair for doing Diamond Painting.
- Use tweezers for diamonds that are not applied properly.
Advantages of Diamond Painting
The advantages of Diamond Painting are as follows:
- Diamond Painting is a stress reliever
- Diamond Painting is a healthy activity for the brain
- Diamond Painting can make to amuse oneself
- Diamond Painting increases the belief in one’s self
- Diamond Painting may become a good hobby.
- Diamond Painting keeps you away from cellular devices and computers, which harm your health.
Disadvantages
Excess of anything is bad, and if you leave the rest of your daily activities and focus on Diamond Painting, then it is disadvantageous.
Step-by-Step Guide to Your First Diamond Painting
Begin by unrolling the canvas and laying it flat under a few heavy books for a day if it arrives curled. Set up a clean, well-lit table, since good lighting makes it much easier to read the tiny symbols. Pour a small amount of one color of drills into the tray and gently shake it so most drills land facet side up.
Peel back only a few inches of the protective film at a time. Press the pen into the wax, pick up a drill, and place it on its matching symbol, pressing lightly so it sticks. Many people finish one color in an area before moving on, while others work row by row. When a section is done, lay the film back down and roll over it gently to set the drills.
Take short breaks every half hour or so to rest your eyes and hands. A comfortable chair, a tabletop that sits at the right height, and a light pad placed under the canvas can make long sessions much easier. Many people also enjoy listening to music, podcasts, or audiobooks while they work, which adds to the relaxing, meditative feel of the hobby.
- Flatten the canvas before starting
- Use bright, even lighting
- Uncover only a small area at a time
- Press finished sections flat with the film or a roller
Common Beginner Mistakes and How to Fix Them
Peeling away too much film at once is a classic beginner error. Exposed glue collects dust, pet hair, and lint, and loses stickiness. If an area has already lost some tack, a very small amount of clear craft glue applied carefully can help drills stay put. Another common issue is mixing up similar colors, especially shades that look nearly identical under dim light.
Crooked rows are another frustration, particularly with square drills. Nudge drills into line with the tip of your pen or tweezers while the glue is still soft. It also helps to label each container with its number code right away, so drills are never mistaken for the wrong shade. Keeping a small lint roller nearby is handy for cleaning the tray and surrounding workspace.
Storage habits prevent many problems before they start. Once you open a bag of drills, pour it into a small labeled container or a storage case with separate compartments. Keep the canvas rolled with the image facing outward, or stored flat, when you are not working on it. Covering the workspace with a cloth also stops dust from settling while you are away.
Finishing, Sealing, and Displaying Your Artwork
Once every symbol is covered, check the canvas under strong light for gaps or drills that are sitting crooked. Press the whole piece firmly with a rolling pin or a clean flat roller covered with the release paper so every drill is well seated. This step is especially helpful for large canvases that have been handled over several weeks.
Many hobbyists apply a clear sealant designed for diamond art to help lock drills in place and add a protective layer. Follow the product directions and test on a corner first. After sealing, you can frame the piece, stretch it over a wooden frame like a canvas print, or turn smaller pieces into coasters, cards, or gifts.
Finished pieces make thoughtful handmade gifts for family and friends, and many crafters enjoy rotating displays on a gallery wall. To keep the colors bright, hang your work away from direct sunlight and damp areas such as bathrooms. Dust framed pieces gently with a soft, dry brush, and avoid using water or household cleaners on the surface.
- Inspect for missing or crooked drills
- Roll the canvas flat to seat each drill
- Seal with a product made for diamond art
- Frame, mount, or repurpose finished pieces
Frequently Asked Questions
Is diamond painting good for beginners?
Yes, it is one of the most beginner-friendly crafts available. The canvas is color-coded, so you simply match drills to printed symbols without needing drawing skills. Start with a small canvas and round drills, which are easier to place, then move on to larger pieces or square drills as you gain confidence.
How long does it take to finish a full canvas?
It depends mainly on canvas size, drill shape, and how much time you spend each session. Small kits may be finished in a few evenings, while large, detailed canvases can take several weeks or even months. Working in short, regular sessions helps you stay steady and enjoy the process without eye strain.
What should I do if my canvas loses its stickiness?
Keep unused areas covered with the film to prevent the problem. If a patch has already dried out or picked up dust, gently clean it and apply a thin layer of clear craft glue with a small brush, working in tiny sections. Let it become tacky before placing drills, and avoid soaking the canvas.
Is diamond painting safe for kids?
It can be a fun activity for older children with adult supervision. The drills are very small and can be a choking hazard, so keep kits away from toddlers and pets. Look for kits labeled for kids, which often have larger drills and simpler designs, and store supplies securely when not in use.