Greetings, parents and purveyors of boundless creativity! If you’re seeking a transformative way to nurture your kids’ imaginative spirits while maintaining a sleek and practical aesthetic, we have just the solution – whiteboard paint! Picture this: turning your little one’s room into a colossal canvas where doodles, dreams, and creativity flow freely. In this article, we’ll delve into the numerous advantages of using whiteboard paint, guide you through the application process, and sprinkle in some delightful ideas to spark your child’s boundless imagination.
Key takeaways
- Prep, prime, and apply the writable coating exactly as the manufacturer directs for a smooth, erasable finish
- Let the coating cure fully before the first doodle, which can take several days
- Use only dry-erase markers and wipe the wall regularly to prevent ghosting
- Choose a well-lit, reachable wall and ventilate the room during painting and curing
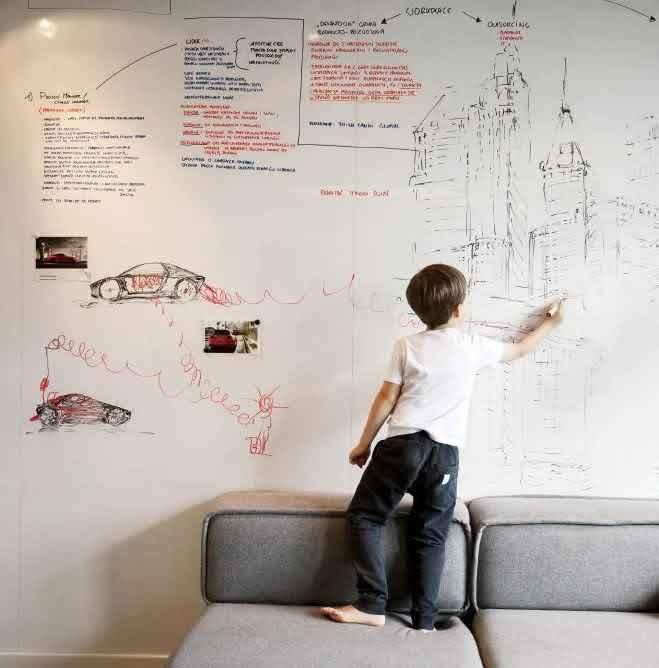
A kid is writing on the whiteboard-painted wall
The Essence of Writable Surfaces: A Blank Slate for Imagination
Whiteboard paint acts as a magical conduit, turning ordinary walls into interactive canvases that transcend traditional drawing surfaces. Say goodbye to constraints; welcome an expansive space where your kids can unleash their creativity without bounds. It’s about providing them with the freedom to express themselves, fostering a realm of endless possibilities.
Why Whiteboard Paint Reigns Supreme in Kids’ Rooms:
1. Igniting Imagination:
Whiteboard paint acts as a catalyst, propelling your child’s imagination into uncharted territories. With an expansive canvas on their walls, they’re encouraged to think outside the conventional and express themselves freely. It’s the perfect breeding ground for creativity to flourish.
2. Learning in Living Color:
Who said learning can’t be exciting? Writable surfaces become dynamic tools for practicing letters, numbers, and shapes. Your kids will embark on a learning journey without even realizing it – a stealthy approach to education through the joy of creativity.
3. Effortless Cleanup:
Accidental masterpieces or doodles gone rogue? Fear not! Whiteboard paint is a breeze to clean. A dry eraser or a damp cloth is all you need to wipe the slate clean, making room for new artistic endeavors.
4. Eco-Friendly Marvel:
Opting for whiteboard paint isn’t just a creative choice; it’s an eco-friendly one too. Bid farewell to mountains of disposable paper, and embrace a sustainable way for your kids to unleash their artistic prowess.
Transforming Walls into Doodle Havens: A Step-by-Step Guide
Now that we’ve grasped the advantages, let’s embark on the journey of transforming your kids’ room into a haven of doodles:
Step 1: Prepare the Surface
Ensure the walls are pristine – clean, smooth, and free from any imperfections. A touch of sanding may be necessary, followed by the application of a primer to enhance the adhesion of the whiteboard paint.
Step 2: Measure and Tape
Utilize a measuring tape to demarcate the area earmarked for transformation. Apply painter’s tape to create a tidy border, ensuring a polished finish.
Step 3: Apply the Whiteboard Paint
Refer to the manufacturer’s instructions for the chosen whiteboard paint. Generally, multiple coats are applied, with ample drying time between each layer. A high-quality paint roller ensures an even application.
Step 4: Sand and Smooth
After the final coat has dried, gently sand the surface to create a smooth finish. This step is pivotal for an optimal drawing experience, ensuring markers glide effortlessly on the writable surface.
Step 5: Season the Surface
Before your little Picassos dive into their creative exploits, it’s imperative to season the surface. Cover the entire surface with whiteboard marker drawings, then erase them. This conditions the surface, making it easier to erase future drawings.
Creative Ways to Exploit Writable Surfaces:
Doodle Central:
Designate a specific wall as Doodle Central. Watch as your kids turn it into a constantly evolving mural, showcasing the vibrant evolution of their artistic expressions.
Show off the Goods:
Create a mini art gallery using magnets or clips. Rotate and display various drawings, providing a dynamic exhibit of your child’s burgeoning talents.
Daily Doodle Zone:
Allocate a section for daily doodles or inspirational quotes. Inject a dose of positivity and creativity into their daily routine with this simple yet impactful practice.
By transforming your kids’ room into a doodle zone with whiteboard paint, you’re not merely creating a space – you’re cultivating an atmosphere of creativity. It’s fun, it’s practical, and it’s a game-changer for their budding imaginations. So, seize that whiteboard paint, which besides in white, is also offered in clear and follow our laid-back guide, to witness your kids turn their room into a canvas of endless possibilities. Let the creativity flow!
How to Choose the Right Whiteboard Paint for a Kids’ Room
Not all writable coatings behave the same way, so it helps to compare a few options before you buy. Many whiteboard paint kits are two-part formulas that you mix just before applying, while others come ready to roll. Two-part products often need to be used within a set time once mixed, so read the label and plan to finish the wall in one session.
For a child’s room, look for low-odor, low-VOC formulas and check the product’s cure time, since some need several days before they can be written on. Consider the finish color, too. Clear coatings let you keep your existing wall color, while white finishes give a classic board look that shows marker colors more brightly. Check how much area each kit covers, as they are often sized for a specific number of square feet.
Prices vary by brand, size, and region, so compare cost per square foot rather than cost per can. A smaller kit may be enough for a single accent panel. It can also help to buy a little extra, since running short partway through can leave a visible line where one batch meets the next. Keep leftover product sealed for future touch-ups.
- Low-odor, low-VOC formula for kids’ spaces
- Clear or white finish, depending on your wall color
- Coverage area per kit
- Pot life for two-part products
- Full cure time before use
Common Mistakes to Avoid When Painting a Writable Wall
The biggest mistake is skipping surface prep. Whiteboard coatings are thin and glossy, so every bump, nail hole, or roller mark shows up and can catch the marker tip. Patch and sand imperfections carefully, and wipe away dust before priming. Painting over textured walls is another frequent problem, because markers will not erase cleanly from the low spots.
Rushing is the second big issue. It is tempting to let kids start drawing as soon as the wall feels dry, but the coating usually needs a longer cure time to harden fully. Writing on it too early can leave permanent marks. Applying the coats too thick can also cause drips and uneven sheen, so use thin, even coats with the roller the manufacturer suggests.
Finally, avoid using permanent markers, crayons, or chalk on the surface. Keep only dry-erase markers in the room, and tell babysitters and visiting friends about the house rule so nobody grabs the wrong pen. If a permanent mark does happen, check the manufacturer’s advice before scrubbing, as some recommend a specific cleaner or tracing over it with a dry-erase marker and wiping it away.
Cleaning and Caring for a Writable Wall
A writable wall stays bright for years with a simple routine. Erase drawings with a soft dry eraser or microfiber cloth after each session, and give the wall a deeper clean every week or two. A cloth lightly dampened with water usually handles everyday smudges. For stubborn marks, many manufacturers recommend a dedicated whiteboard cleaner, so check your product’s care instructions before trying anything stronger.
Ghosting, the faint shadow of old drawings, often happens when marker sits on the surface for a long time. If your child makes a masterpiece they want to keep, snap a photo and erase it instead of leaving it up for weeks. Avoid abrasive pads, scouring powders, and harsh chemicals, which can dull the finish and make future erasing harder.
Over time, heavy use may wear the coating in the most popular spots. Many products can be lightly sanded and recoated when this happens, which gives the wall a fresh start without redoing the whole room. Keeping a small tray for markers and erasers near the wall also helps, since kids are more likely to erase properly when the tools are within easy reach.
- Erase after each drawing session
- Wipe with a damp microfiber cloth weekly
- Photograph favorite art rather than leaving it up
- Avoid abrasive cleaners and scrubbing pads
Frequently Asked Questions
Is whiteboard paint safe for kids’ bedrooms?
Many writable wall coatings are suitable for kids’ rooms once they have fully cured, but safety depends on the specific formula. Choose low-VOC or low-odor options, ventilate the room well during painting and curing, and keep children out until the manufacturer says the surface is ready. Always read the product’s safety information before you start.
How long does dry-erase wall paint take to cure?
Cure times vary by product, but many need several days before you can write on them. The surface may feel dry within hours, yet it needs extra time to harden fully. Writing too soon can cause permanent staining, so follow the manufacturer’s instructions and resist letting kids test the wall early.
Can you put dry-erase paint on textured walls?
You can, but results are usually disappointing because marker settles into the low spots and becomes hard to erase. For the best experience, smooth the wall first with a skim coat of joint compound, sand it, and prime it. Alternatively, apply the coating to a smooth panel mounted on the wall.
Why is my whiteboard wall leaving ghost marks?
Ghosting usually happens when marker is left on the wall for too long, when the coating was written on before it fully cured, or when non dry-erase markers were used. Try a whiteboard cleaner and a soft cloth. Erasing drawings regularly and using quality dry-erase markers helps prevent it from coming back.